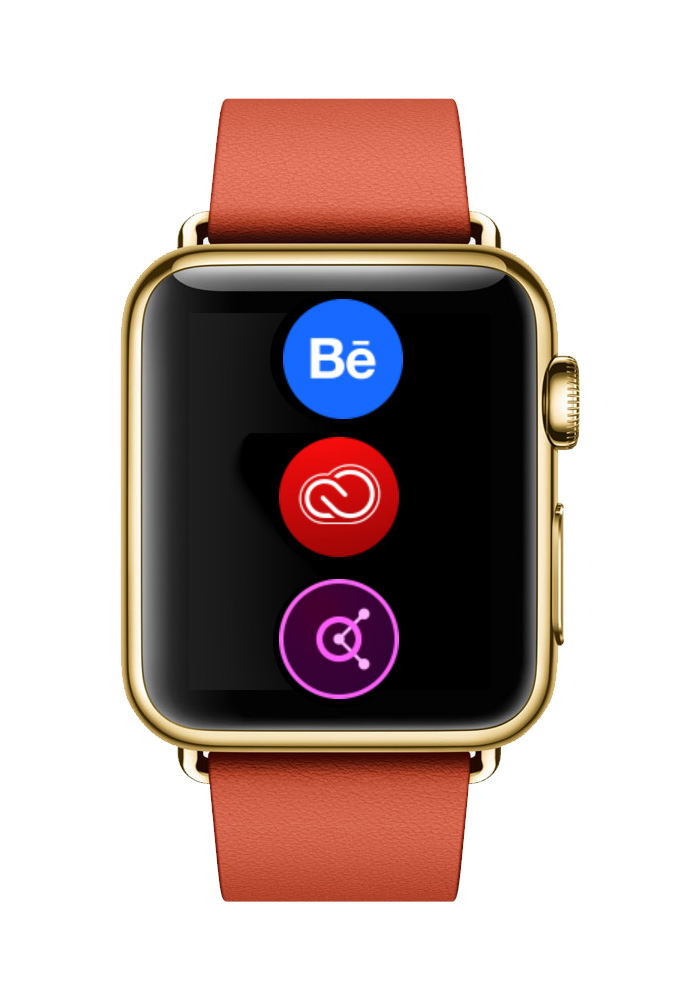
My favorite Adobe Mobile apps on my Wrist
I am a big fan of Behance, Adobe Color CC, and Adobe Creative Cloud. You can imagine how happy I was to see those apps on my Apple Watch. You are probably asking why I am so happy to see those apps on my Apple Watch. Here’s why:
Behance App:
I am a HUGE fan of Behance. I love to share my work with the Behance community along with finding inspiration from other’s portfolios.
I always have Behance open on my iMac or MacBook Pro and if I am anywhere else away from my computer I am checking my Behance app all the time on my iPhone. But for many situations where I was not able to use my phone I also was not able to check my Behance. Now with Behance on my Watch I can stay in touch with the Behance community (at a glance) all the time from anywhere without the need to take my iPhone out (even if I am walking my dog)
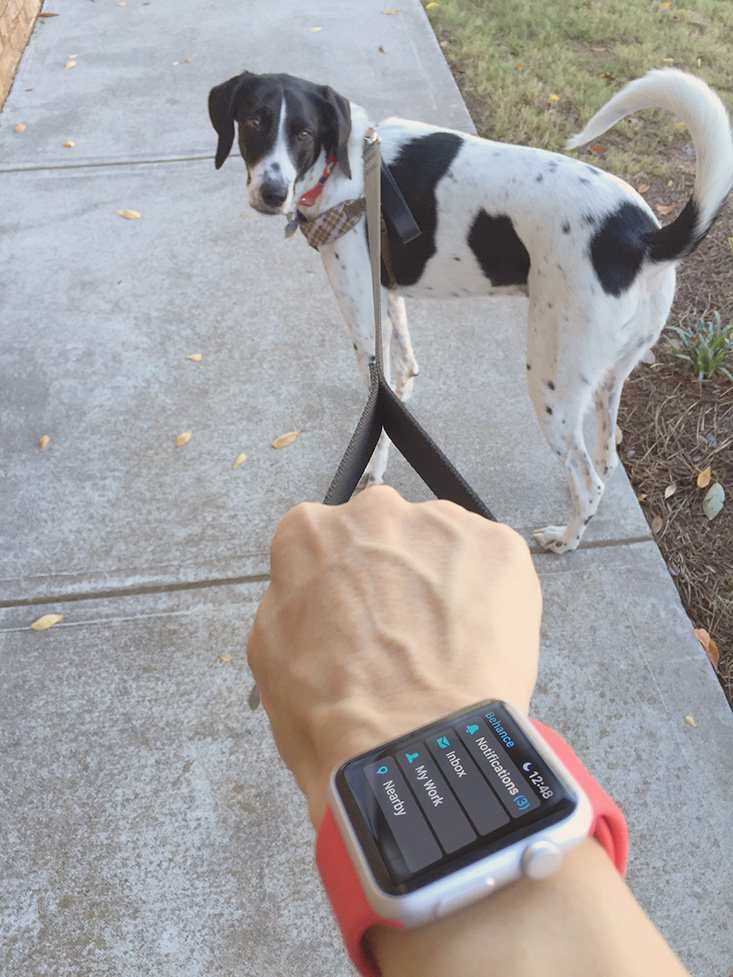
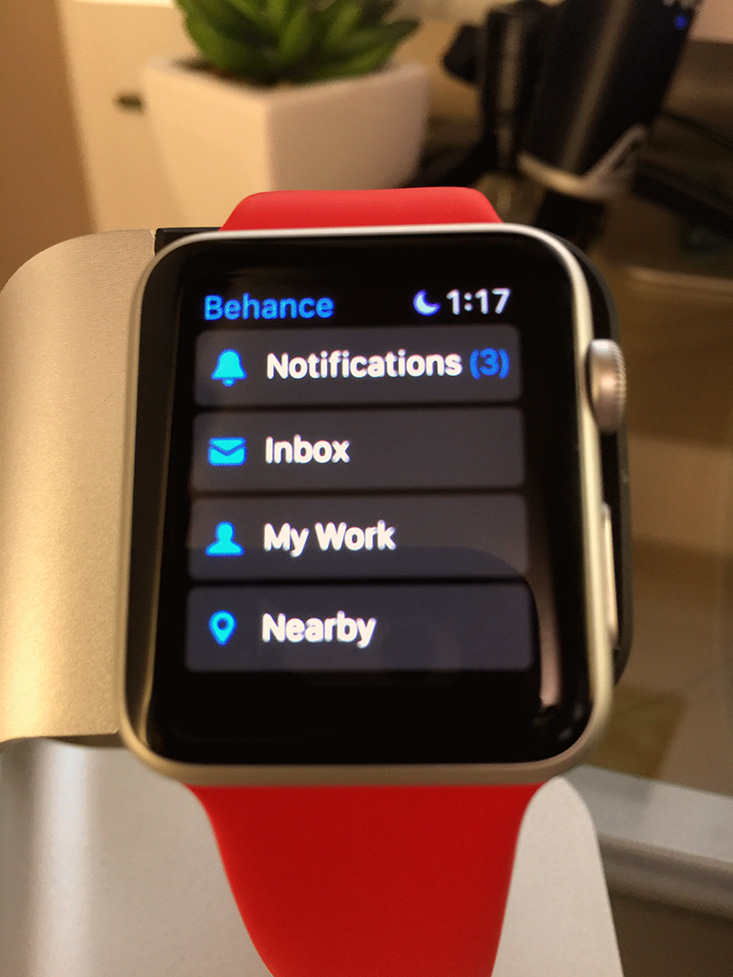
What’s in the Behance Apple Watch app?:
- Notifications
- Inbox
- My Work ( your portfolio or work in progress)
- Nearby ( you can connect with all creative people around you)
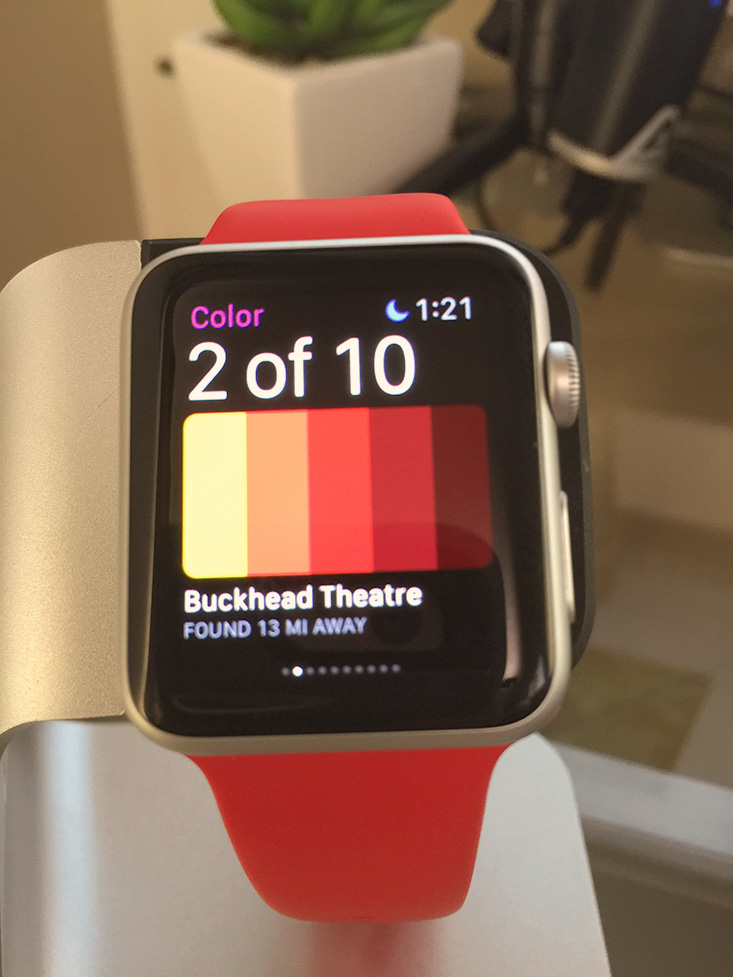
I am absolutely in love with with this app. I’m using Adobe Color CC all the time. I am using Adobe Color CC when I travel (the colors I capture on the go are available in my CC Libraries when I get back to my desk). I can create any shape using Adobe Shape, for example, and I can continue working on my shape later on using the colors that I captured using Adobe Color CC.
Since the Apple Watch doesn’t have a camera, it does the next best thing. Adobe Color CC on Apple Watch shows the TOP 10 color themes based on your location. You can choose to add 1, 2, or all 10 to your Library. Once you add one color theme it will create a Watch Themes Library and sync it to your Creative Cloud account.
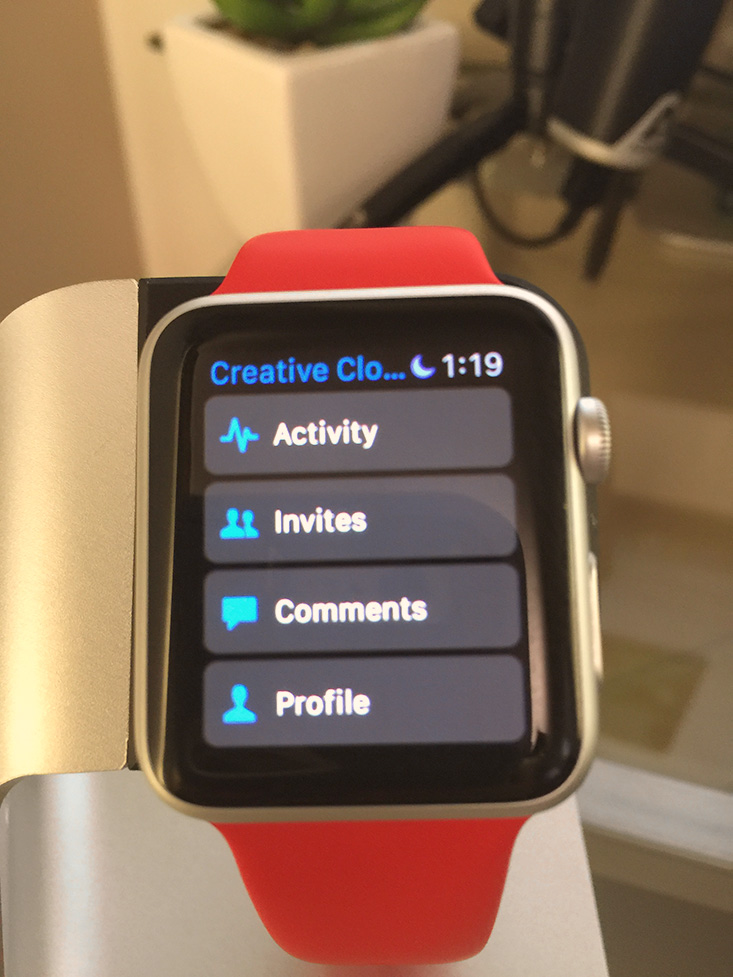
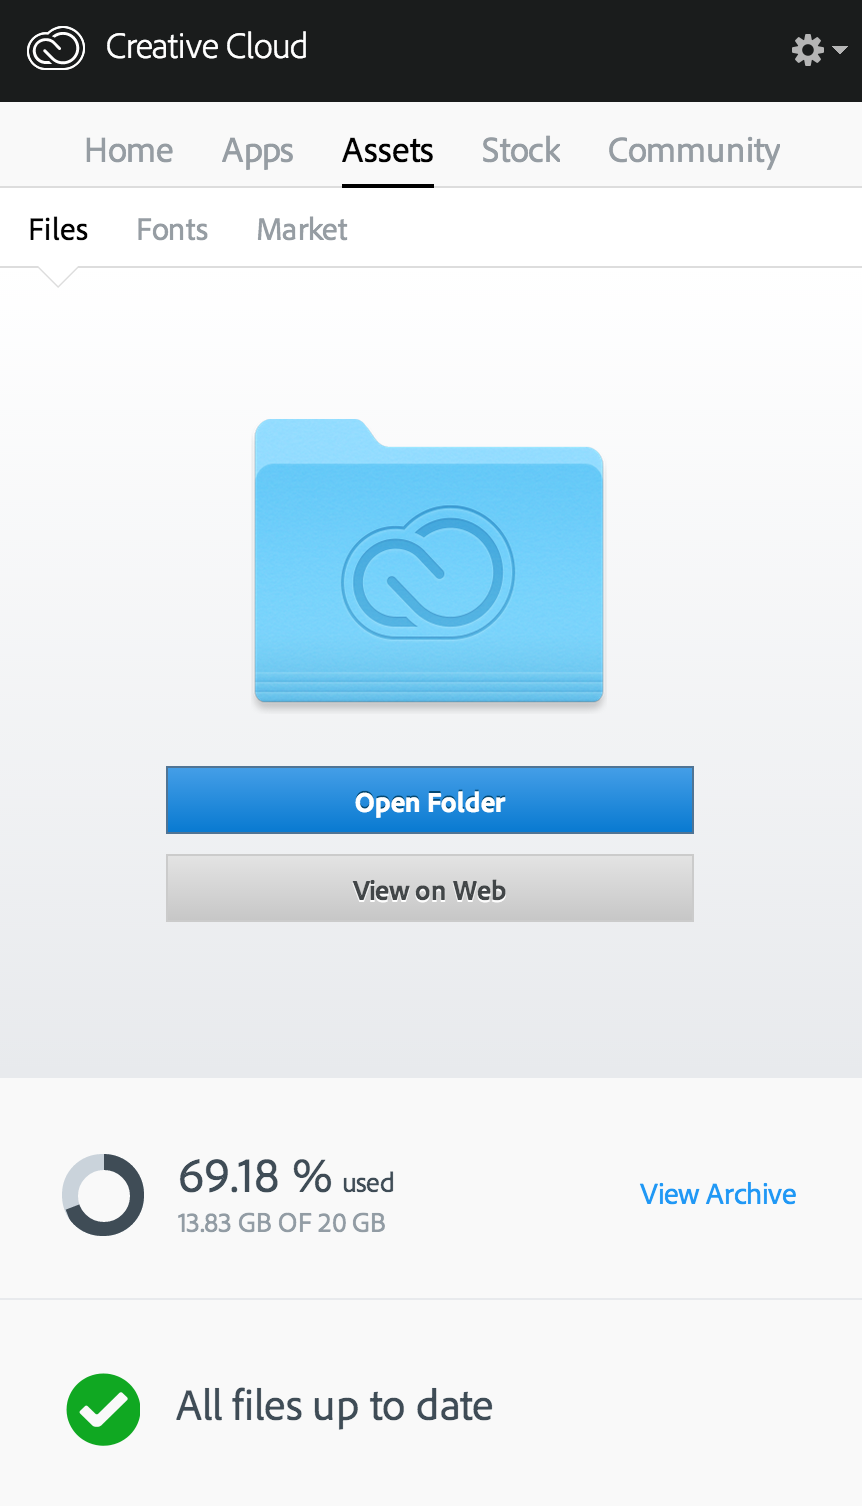
I am using my Creative Cloud app all the time. I am using CC folders all the time with my workflows (mobile and desktop) and for me it is very important to be able to access to my CC account any time from anywhere.
With the CC app on my Apple Watch I can access to my:
- Activity
- Invites ( now you can stay in touch ALL THE TIME)
- Comments ( you will never miss any comment)
- Profile
SO with all those apps my busy life is a little less complicated…and I LOVE it.