5 reasons to attend Photoshop World 2015

Photoshop World 2014

5 reasons to attend Photoshop World 2015

1: Just in a few days you will learn more than you can learn for few years. Life experience, photo sessions, and meeting new creative people, A LOT of energy and inspiration.

2: You will learn in a friendly  and welcoming atmosphere “directly” from leaders in industry such as  Scott Kelby,Terry White, Joe McNally, Bert Monroy, Larry Becker, Julieanne Kost and more! After any class you are able to meet instructor, ask questions ( and take a selfie 🙂  )

3: Networking opportunity: if you a freelancer or a business owner, networking is everything to you. Through networking you have the opportunity to meet new people, makes new friends and let people know about you. Show your portfolio and ask for their professional opinion  about your work. And ALL OF THIS IS INCLUDED.

4: Discover and learn all the latest tips and techniques from Design or Photography industry from World leaders exhibits such as:

Adobe
B&H
Arkon
Dolar Photo Club
Epson
and much more

5: It’s a lot of FUN!

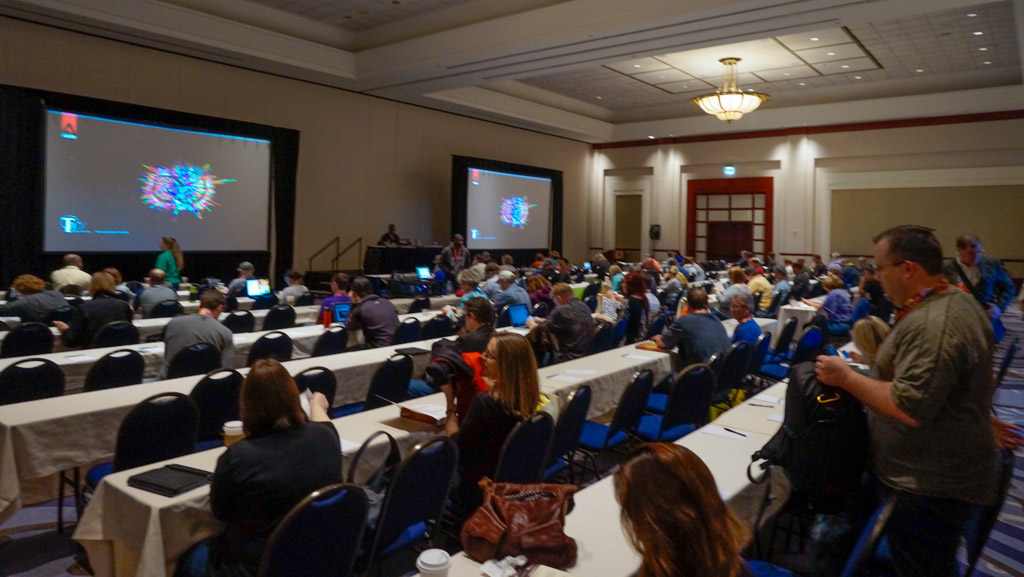
Going to Photoshop World 2015 in Vegas?

PSW-2015-banner

If so you can SAVE $50 by registering here with the Discount Code: TerryWhite50

Convert your photo into a drawing

Step by step tutorial how to convert your photo into a drawing using  Adobe Lightroom  CC:

1: Open your image in the Develop module  ( I am using Adobe Stock   image #57908828

Screen Shot 2015-07-09 at 12.31.15 PM

2: Click on the Black & White Tab

Screen Shot 2015-07-09 at 12.34.07 PM

3: Apply the following setting

Screen Shot 2015-07-09 at 12.36.02 PM

Screen Shot 2015-07-09 at 12.36.39 PM

4: Using Tone Curve apply following setting

Screen Shot 2015-07-09 at 12.38.30 PM

Screen Shot 2015-07-09 at 12.39.29 PM

5: Apply the following Black & White Setting

Screen Shot 2015-07-09 at 12.42.07 PM

Screen Shot 2015-07-09 at 12.42.17 PM

Adobe Lightroom Tutorial

My Adobe Photoshop & Adobe Illustrator Seminar

How to create a simple Valentine’s Day card in Adobe Illustrator

How to get started with still-life painting in Adobe Photoshop


Fotolia


SanDisk 32GB Class 4 SDHC Memory Card, Frustration-Free Packaging- SDSDB-032G-AFFP (Label May Change)

SanDisk Ultra 32GB UHS-I/Class 10 Micro SDHC Memory Card Up to 48MB/s With Adapter- SDSDQUAN-032G-G4A [Newest Version]

Samsung 64GB EVO Class 10 Micro SDXC up to 48MB/s with Adapter (MB-MP64DA/AM)


Download Adobe Lightroom 

From “traditional” to digital painting

I always believed that we have reached the point that there are no more boarders between “traditional” and digital art.  Using Moleskine and Adobe apps we can jump from a “traditional”  pencil painting to digital painting using Adobe Photoshop CC.

I started my project using the  Moleskine Smart Notebook (Creative Cloud connected )

IMG_3294


Using the FREE  Moleskine, a Creative Cloud connected app I took picture of my sketch . The image was saved in my Creative Cloud folder.

IMG_3293

And I finished my project in Adobe Photoshop CC  using a Wacom Tablet

11010990_10155744478600392_7108298322535764797_n

Wacom Intuos Pro Pen and Touch Medium Tablet (PTH651)

Wacom Cintiq 13HD Interactive Pen Display (DTK1300)


Live preview of Dehaze effect in Adobe Lightroom

This year I went to a local park for a 4th of July fireworks display. I pretty much got some nice images using my Nikon  and Terry White’s firework shooting settings.  But  it doesn’t matter how good your settings are we still cant avoid the smoke in our fireworks pictures. Thanks to the Dehaze effect in Adobe  Lightroom CC  I can remove the smoke from my pictures in a second simply moving Dehaze effect slider to the right. Moving Dehaze slider to the right from 0  to +100 you are removing haze/smoke from your pictures. Moving the Dehaze effect slider from 0 to -100 you can add a haze effect to your pictures.

Screen Shot 2015-07-08 at 8.07.10 AM


See it in action here:

Dehaze effect In Lightroom


How to Make a Movie Poster with Adobe Photoshop Mix

Click on + icon

IMG_1021

Click on Camera Roll icon

IMG_1006

Choose your first ( and it will be our background ) image

IMG_1008

Resize your image

IMG_1009

Adjust > Exposure ( move exposure’s slider all way to the left to apply the Night Time Effect to our background layer)

IMG_1009C
IMG_1010

Click on the second layer icon and add your second image

Click on Cut Out icon. Now we need to remove the Moon’s background.
IMG_1012

Resize the Moon’s size

Adjust > Exposure ( move exposure’s slide to the left to make the moon darker )

Holding the Moon Layers move this layer over our Background layer
IMG_1015

Now we have another “empty” layer. Click on the “empty” layer and chose the robot image

IMG_1016

Cut Out > Remove Robot’s image background

Adjust > Exposure > Move Exposure slider to the left to make robot image absolutely dark

IMG_1017

Holding Robot Layer icon move this layer over our First layer

Click on Looks icon > Natural + look

IMG_1018

Adjust > Saturation > Move slider to the left

Send to Photoshop > Your image is Stored in your Creative Cloud Photoshop Folder

IMG_1019

IMG_1020

Open your Photoshop Mix image in Photoshop

Screen Shot 2015-07-06 at 7.57.02 AM

Adobe Paper Texture Pro

Screen Shot 2015-07-06 at 7.59.21 AM

Chose any paper texture you like to work with > Image > Adjustment > Vibrance

Screen Shot 2015-07-06 at 7.59.50 AM

Make Layer opacity = 67% > Gradient Tool ( with opacity = 18% )

Screen Shot 2015-07-06 at 8.03.39 AM

Apply mask to highlight the moon and robot

Screen Shot 2015-07-06 at 8.04.57 AM

Adjustment Layers > Exposure

Screen Shot 2015-07-06 at 8.05.50 AM

Final

Musician

Musician painted in Adobe Photoshop CC and Wacom using Mixer Brush Tool

Painted with Adobe Photoshop CC & wacom

Painted with Adobe Photoshop CC & wacom

Painted with Adobe Photoshop CC & wacom

Painted with Adobe Photoshop CC & wacom

Painted with Adobe Photoshop CC & wacom

Painted with Adobe Photoshop CC & wacom

Painted with Adobe Photoshop CC & wacom

Painted with Adobe Photoshop CC & wacom